- For using augmented reality in showing wall-mounted products, such as wallpaper, various types of frames and carpet panels, curtains, and the like, you can use this category to make your projects.
1. Specifications of the product photo
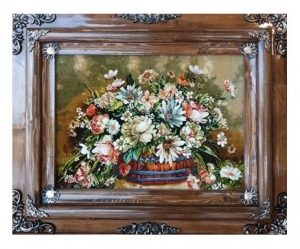
- Since making a project in the wall-mounted category is based on the product photo, keep the following in mind before making the project:
1.1. How to take pictures
- – Take high-quality photos of all the products in your store.
- – The photos should match the example you see on this page, from the front view.
- – If the photos have an extra border, crop them.
1.2. Naming the photos
- – Considering that the projects are named based on the names of the photos, it is better to use the product code to choose the names of the photos so that you don’t have problems finding the built projects and it is easier for you to search for them
- – Use only English letters, English numbers, dash (-), or a combination of them (for example, frame-777-flower) in naming product photos. The use of letters and numbers of other languages, dot, comma, underline, space, etc. in naming is not allowed and you will get an error message
1.3. Format and size of photos
- – The format of the photos must be JPG or PNG.
- – There is no limit on the size of the photos, but the smaller the file size (as long as it does not damage the quality of the photo), the higher the upload speed and the better experience in the final output.
2. Stages of making a wall-mounted project
To make a project in the wall-mounted category, it is not necessary to make projects one by one. For your convenience, we have provided the possibility of simultaneous making of projects in the wall-mounted category so that you can make all your projects at once. To make the project, follow the steps below carefully:
- 1. After taking photos of the products according to the specifications mentioned in the previous section, put all the desired photos in a compressed file in zip format. Make sure that there are no folders inside the zip file and send only the photo files as a zip.
- 2. You can choose the size you want for each wall-mounted product so that the product with real dimensions is displayed in the environment. For this purpose, select the desired size in the “Product Size” section. It is better to put products of the same size in a zip file so that, for example, the project of 50*70cm products can be made for you in one place.
- 3. After choosing the zip file and desired size, you will be asked to confirm the project. By selecting the “Confirm” button, the making of projects will begin.
- 4. Depending on the number and volume of files, the duration of making projects will be different. Be patient until the making of projects is completed.
- 5. After finishing the process of making projects, you can see the last made projects in the “Projects” section.
If you have any questions, just contact us.